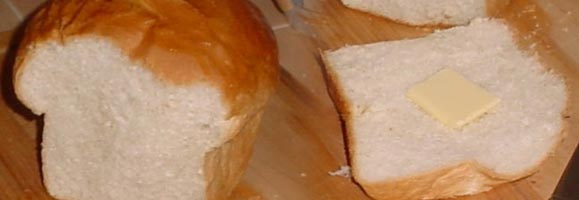
What’s better than the aroma of freshly baked bread on a cool Fall or Winters Day? One of my favorite things is the smell of freshly baked bread. It always takes me back to days gone by… I can almost feel the warmth of my Great Grammy’s old wood stove.
Bread is not a difficult thing to make. It just takes a little practice. When making homemade bread, you should plan to set aside at least 4 hours of your day to dedicate to this task. It will be well worth the effort!
Directions:
Yield: One 8″ pan (4-6 servings)
- Put three cups of flour, shortening, sugar and yeast in large mixing bowl. Blend together with wooden spoon.
- Add water and another cup of flour. Blend together.
- Add another 1/2 cup of flour and the salt. Blend together.
- Dump contents of bowl onto counter and continue to blend by hand and knead the dough adding flour as required to prevent sticking.
- Knead dough for 8 – 10 minutes or until you have a nice smooth ball that is no longer sticky.
- Place in large bowl greased with shortening and cover with a clean towel. Place in a warm, draft free area to rise until double in size (approx. one and a half hours).
- Punch down and shape into loaves. Place in greased 8″ loaf pans, cover with clean towel and allow to rise in warm, draft free area for another hour, until double in size.
- Remove towel and place in preheated 400°F oven, center rack, for 30 minutes. Remove from oven and pans. Brush crust lightly with butter or margarine and cool on wire racks.
ENJOY!!!
Ingredients:
- 5 to 6 1/2 cups – All Purpose Flour
- 1 and 1/2 tbsp of Fleischmann’s Instant Quick Rise Yeast
- 1/4 cup of Shortening (Room Temperature)
- 1/4 cup of Sugar or Honey
- 1 tsp of Salt
- 2 cups of Hot Water (100°F)


Thats AWESOME!!!! Thanks for the update 🙂
Next batch worked much better, YUM YUM YUM. Thanks so much Candra 🙂
Hi Ian,
Yes, you did indeed answer your own question…LOL
It’s really hard to give an exact amount of flour in bread making because there are so many variables at play.
Bread making takes a little practice, but it’s well worth the effort and you are definitely on the right track!
Thanks so much for taking the time to write and best of luck with your next batch 🙂
Take care!
Candra
Ahh I think I answered my own question by comparing your written instructions with the youtube clip. On step 4 where you say “adding flour as required” I see in the video you added a whole extra cup. I wasn’t adding anywhere near that much extra 😛 Will give it a go.
Hi Candra
I hope its not too late to ask a question here.
After the second rise of my dough mine is not looking all smooth like yours, its kind if cratered like the surface of the moon and is still a bit sticky, the cloth I have over it is sticking to it a bit. Then it flops just a little (about an inch) when I put it in the oven. My suspicion is that I’m not adding in as much extra flour while kneading as you and my dough is too moist. Would you recommend trying a bit more flour?
Love your site 🙂
ta
Hi Shirlynn,
I am attaching a link to my window pane test video. If you can’t get there using the link, just scroll through my older posts and you will find it there. It’s well worth the watch as it is a great way for nivice bread makers to know when their bread dough has been kneaded enough.
http://www.cookingwithcandra.com/blog/2010/05/04/ask-candra-the-window-pane-test/
Hope this helps 🙂
Candra